Hanging curtains might seem simple, but doing it properly can transform your space from ordinary to stunning. Whether you’re moving into a new home or refreshing your current rooms, knowing how to hang curtains correctly makes all the difference.
This practical, New Zealand-focused guide walks you through every step so you get perfect results—every time.
Why Proper Curtain Hanging Matters
Before diving into the “how-to,” it’s important to understand why correct installation is essential. Properly hung curtains:
- Enhance the appearance of your windows
- Improve privacy
- Offer better light control
- Boost insulation during chilly Kiwi winters
- Make rooms look taller, wider, and more elegant
When curtains are hung at the ideal height and width, they frame your windows beautifully and instantly elevate your interior style.
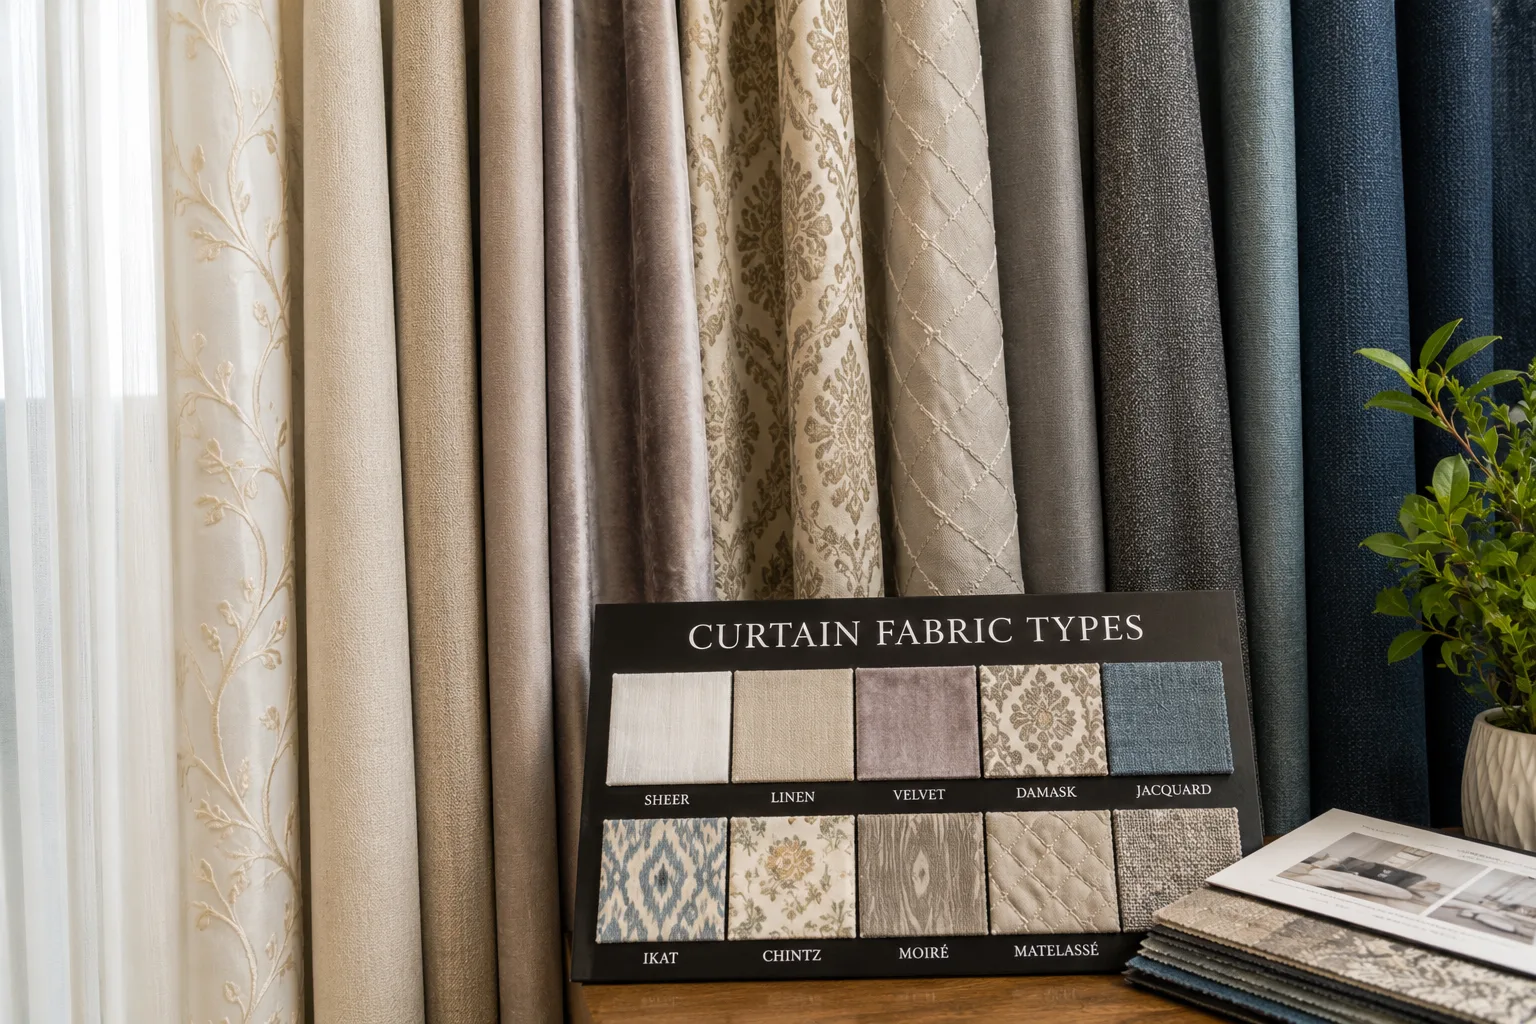
What You’ll Need to Hang Curtains
Before you start, gather your tools to make the process smooth and stress-free:
- Curtain rod or track system
- Brackets and mounting hardware
- Drill and drill bits
- Rawl plugs or wall anchors (important for plasterboard walls in NZ)
- Spirit level
- Tape measure
- Pencil
- Screwdriver
- Step ladder
- Optional: Stud finder
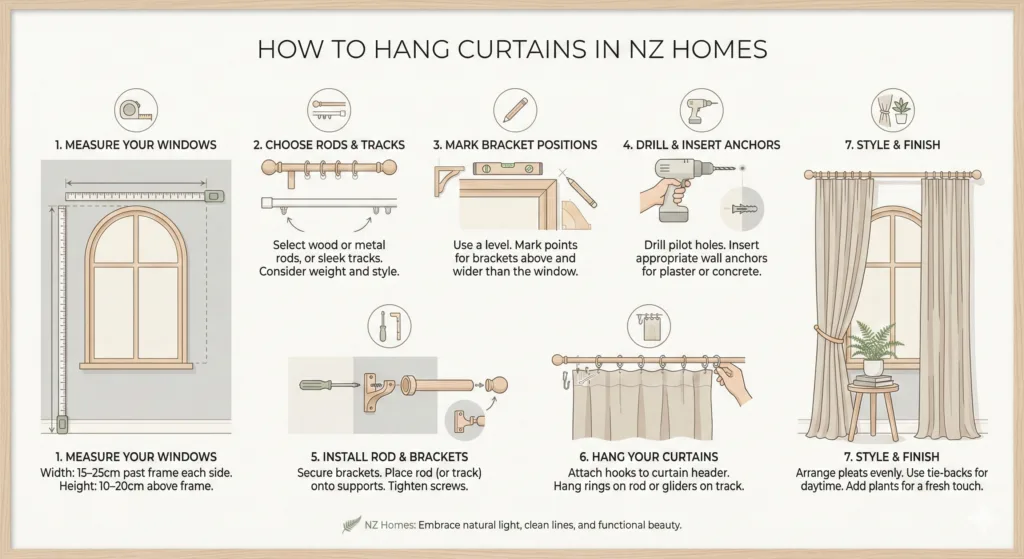
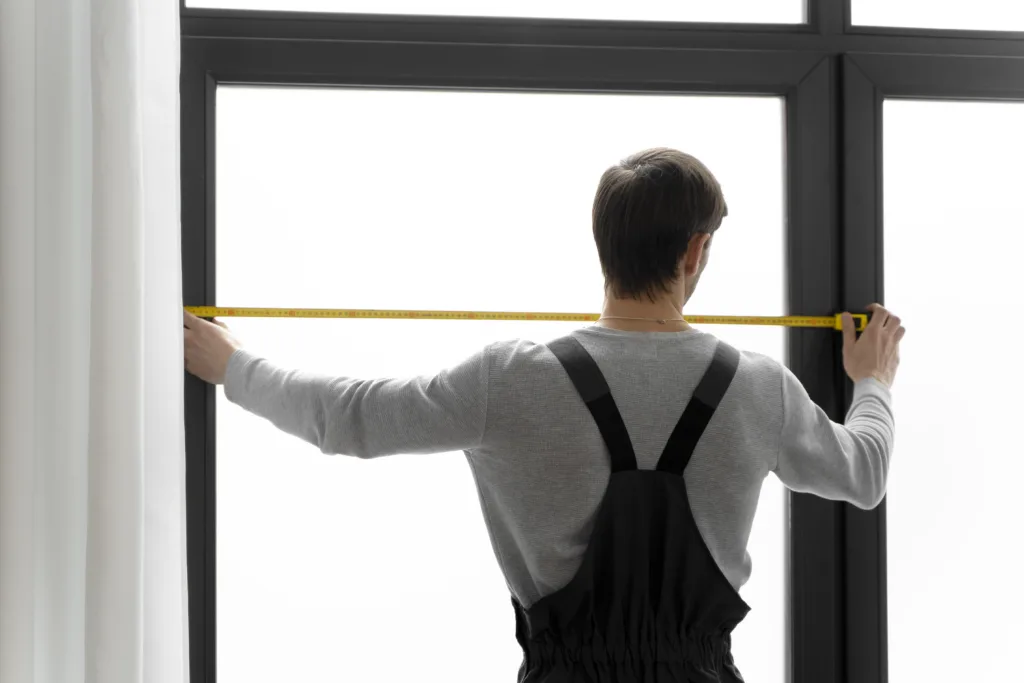
Step 1: Take Accurate Measurements
Measuring correctly is crucial for achieving a polished, professional finish.
Height:
- For a classic, elegant look: mount the rod 10–15 cm above the window frame.
- To make ceilings appear higher: mount it closer to the ceiling.
Width:
- Extend the rod 15–25 cm past each side of the window frame.
This ensures the curtains can open fully without blocking natural light.
Length (Drop):
- Just touching the floor: timeless, tailored look
- 1 cm above the floor: tidy and practical
- 5–10 cm puddle: soft, luxurious, contemporary feel
Step 2: Choose Your Hanging System
NZ homes commonly use several curtain hanging systems:
- Curtain Rods
- Great for most window styles; available in various finishes to match your décor.
- Curtain Tracks
- Smooth operation + ideal for heavier fabrics or bay windows.
- Tension Rods
- Perfect for small windows with lightweight curtains and a minimalist look.
Be sure your system can support the weight of your curtains—especially thermal or blackout fabrics common in colder NZ regions.
Step 3: Mark Your Bracket Positions
Using your measurements:
- Mark the first bracket position at the correct height.
- Use a spirit level to ensure the second mark is perfectly aligned.
- If your rod is over 2 metres or supporting heavy curtains, mark a centre bracket to prevent sagging.
Nothing ruins beautiful curtains like a crooked rod—so take your time with this step.
Step 4: Install the Brackets
Your wall type determines the right installation method:
Plasterboard Walls (common in NZ homes)
- Use a stud finder to see if you can drill into timber framing.
- If not, always use rawl plugs or wall anchors for support.
Brick or Concrete Walls (common in older NZ homes)
- Use masonry drill bits and appropriate wall plugs.
Secure the brackets firmly and check that they are level.
Step 5: Hang Your Curtain Rod
- Place the rod into the installed brackets and tighten screws or clips.
- For track systems, follow the manufacturer instructions to ensure smooth gliding.
Double-check the rod is straight before moving on.
Step 6: Add Your Curtains
This is the most satisfying part!
- Thread curtains onto the rod (eyelet or ring-top styles).
- Clip ring curtains one by one if needed.
- Space the pleats evenly for a balanced look.
Step back and make sure the curtains hang neatly and symmetrically.
Step 7: Final Adjustments and Styling
- If curtains are slightly long: raise the rod.
- If slightly short: lower the rod.
- Use tiebacks for daytime styling or to maintain curtain shape.
- Creases from packaging will fall naturally—or steam gently for instant results.
Top Tips for Perfect Results
- Invest in good-quality brackets and rods—cheap ones can fail.
- Always measure twice, drill once.
- Make sure curtains open fully without hitting furniture or heaters.
- For blackout curtains, mount the rod higher and wider to reduce light gaps.
Common Mistakes to Avoid
- Hanging curtains too low (makes ceilings feel shorter)
- Using a rod that’s too narrow
- Skipping wall anchors in plasterboard
- Not checking curtain length before installation
Conclusion
You’ve now mastered the art of how to hang curtains like a pro. With everything securely installed and beautifully styled, your curtains are ready to elevate your home.
If you’re searching for your next perfect window dressing, explore Gorgeous Curtains—our full range of ready-made and custom options designed specifically for New Zealand living. From stylish designs to high-quality, functional fabrics, Contact Gorgeous Curtains has everything you need to complete your space with confidence.